Setting up an Actual PC on Android with Termux, i3, and XFCE Utilities!!
from Tech | 8 min read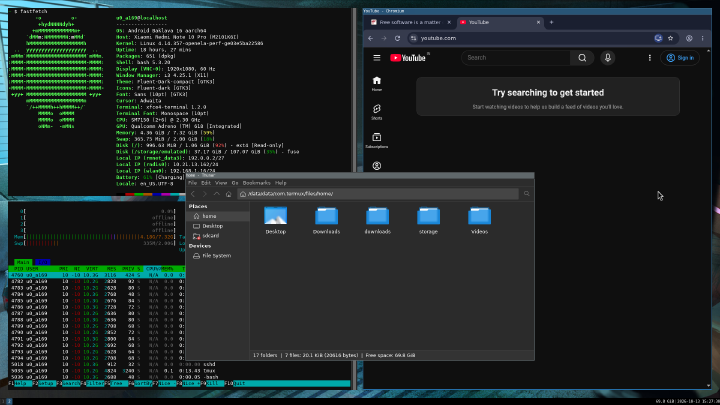
Android phones are very close to being called personal computers — technically, they are, but people don’t associate them with PCs because PCs, as we know them, run complex programs, most of them being highly specialized, with expected features like complex video editing using Kdenlive or a full office suite like LibreOffice.
And the beauty of the Android OS is that its open nature has allowed passionate developers to hack around and create extraordinary applications like Termux.
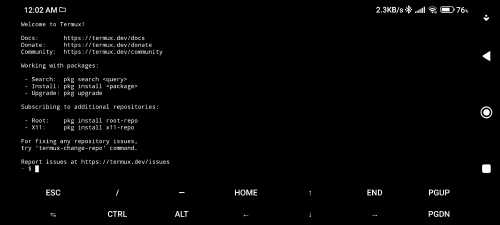
What is Termux? You might ask — Termux is a terminal emulator for Android that gives you a GNU-style command-line environment with which you can build a graphical desktop using additional software, such as i3, XFCE components, and a VNC server, similar to what you’d find on GNU/Linux distros.
You can install packages, run commands, start servers, and do most Linux stuff — directly on your phone.
It’s lightweight. It’s powerful. And it’s kinda cool.
First — Install Termux Properly
Don’t install it from the Play Store, where the version has historically been outdated.
- Install it from F-Droid (recommended) from here or use the direct APK link.
- After installing, open it up.
1. Get a nearby repository (optional)
termux-change-repo
Choose a repository mirror that works well for you.
2. Install the basic commands and services
Run the basic commands needed for a fresh install:
pkg update
pkg i openssh termux-services tmux neovim
Enable the SSH service:
sv-enable sshd
Set up authentication (your SSH password):
passwd
Run whoami to find your Termux username and ifconfig to look at your IP. If ifconfig isn’t available, install net-tools or use ip addr.
3. Log in to SSH
From your PC, connect to your phone using:
ssh -p 8022 username@IP
Replace username with your Termux username and IP with your phone’s reachable IP address.
Read more at nc + pv for local pipes — Android port limitation and using Proot.
4. Install the needed repositories
pkg i root-repo x11-repo tur-repo
5. Get the Termux extras
I advise getting all Termux-native services and API features, as they are very useful — which I will explain in great detail in upcoming articles.
6. Launch a tmux session
Launch a tmux session for a clean workflow:
tmux
7. Upgrade all packages
With the new repos, upgrade all packages using:
pkg upgrade
While you can run heavy GUI desktop environments like XFCE, LXDE, or even KDE Plasma, I wouldn’t suggest them for small screens and particularly for our VNC setup, as they may require more computing power for unnecessary screen updates triggered by floating window movements.
Read more at Why tiling windows is actually multitasking — don’t let the likes of Winos limit u.
So i3 is better for this setup and is also easy to customize — XFCE has a good selection of default GUI apps for everyday use, like Thunar and xfce4-terminal, for real-world use cases on your portable PC.
8. Install i3 and XFCE utilities
pkg i xfce4 i3 dmenu
9. Setting up a suite of cool apps — Pro apps need big screens (VNC to laptop).
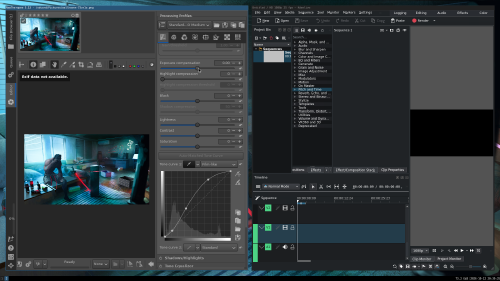
Lightweight core multimedia apps
pkg i ffmpeg mpv mpd imagemagick ncmpcpp
Pro / heavyweight apps
pkg i kdenlive gimp rawtherapee
More at Android par excellence.
Internet
Core:
pkg i nmap pv aria2 yt-dlp netcat-openbsd
For downloading gallery content and working with media metadata, install Python first:
pkg i python
python -m pip install gallery-dl mutagen
GUI:
pkg i chromium qbittorrent
Documents
Core:
pkg i pandoc ghostscript
Pro:
pkg i libreoffice texlive-bin
(Making clean and professional docs)
Package availability can vary across Termux repositories and Android versions, so check for availability if a package fails to install.
10. Set up VNC using TigerVNC
Now we have sufficient programs to get started, so let’s set up VNC using TigerVNC.
VNC, just like RDP, is a protocol used for displaying and interacting with a desktop remotely — and TigerVNC is a popular implementation of it. The VNC family has an interesting history, so you might want to read about it.
Install it with:
pkg i tigervnc
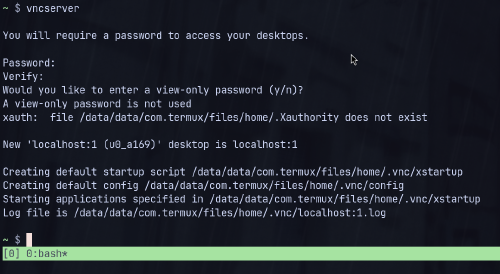
Run vncserver and set a nice, easy-to-remember password. As usual, this is intended for local usage unless you really want to use it with the setup described in Android and FMD using Termux SSH and JioNet’s IPv6 infra.
It should show something like:
New 'localhost:1 (u0_a169)' desktop is localhost:1
The display number :1 conventionally corresponds to port 5901.
Configure i3 to start with VNC
A VNC server needs to know which desktop session to launch. For a typical TigerVNC setup using ~/.vnc/xstartup, configure i3 as the session:
mkdir -p ~/.vnc

cat << 'EOF' > ~/.vnc/xstartup
#!/data/data/com.termux/files/usr/bin/sh
unset SESSION_MANAGER
unset DBUS_SESSION_BUS_ADDRESS
exec i3
EOF

chmod +x ~/.vnc/xstartup
If your installed TigerVNC version uses a different startup configuration, follow its generated configuration or package documentation.
Now start the VNC server:
vncserver :1
If it is already running and you need to restart it after changing the startup script:
vncserver -kill :1
vncserver :1
11. Access your internal storage
All our user files are in internal storage — run the command below to access your files:
termux-setup-storage
Follow the Android permission prompt.
[!WARNING] Do not expose your VNC server directly to the internet. A VNC password alone should not be treated as sufficient protection when exposing the service to an untrusted network.
The base is ready!!
On your PC, install a VNC viewer such as TigerVNC Viewer.
If your VNC server is listening on your phone’s LAN interface, connect using IP:5901. However, if it reports localhost:1 and listens only on loopback, a direct LAN connection won’t work.
In that case, use an SSH tunnel from your PC:
ssh -p 8022 -L 5901:localhost:5901 username@IP
Keep that SSH connection open, then connect your VNC viewer to:
localhost:5901
This lets you access VNC through SSH without exposing the VNC port directly to the network.
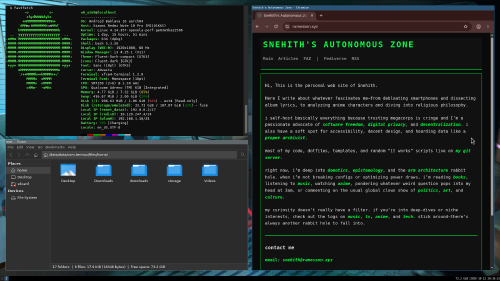
1. Now, ricing i3
pkg i lxappearance feh
Installing Kdenlive may bring in Breeze-related theme components; I prefer Fluent, so:
pkg i fluent-gtk-theme fluent-icon-theme
I prefer gaps between windows, so add the following to ~/.config/i3/config:
gaps inside 10
gaps outside 10
Now get a nice wallpaper and test it:
feh --bg-fill ~/storage/pictures/wallp.jpg
Or use the path to your wallpaper under /storage/emulated/0/Pictures/.
To make the wallpaper and gaps apply automatically, append the following to your i3 configuration instead of adding the same settings manually a second time:
cat << 'EOF' >> ~/.config/i3/config
gaps inside 10
gaps outside 10
exec --no-startup-id feh --bg-fill ~/storage/pictures/wallp.jpg
EOF
Reload the i3 configuration using Mod+Shift+R (where Mod is usually the Windows key or Alt, depending on your configuration).
2. I use this setup to make my workflow flow
Yeah, I mean flow like a river, i.e., all I need is a VNC viewer to get my setup running on any computer.
Hardware acceleration
You typically don’t need hardware acceleration for desktop usage, but if you really need to run apps that require it — typically Chromium, LibreOffice, glmark2, etc. — you can try VirGL.
[!WARNING] Some apps might not work as intended — as I observed with Chromium being unable to render fonts — so use it according to app compatibility.
1. Install VirGL
pkg install virglrenderer-android
2. Start the VirGL server
virgl_test_server_android &
Keep the server running while using applications that depend on it.
3. Run an application with VirGL
To try VirGL with a particular application, run:
GALLIUM_DRIVER=virpipe MESA_GL_VERSION_OVERRIDE=4.0 <program>
Replace <program> with the application you want to test. These environment variables request a particular graphics driver and GL version; they don’t guarantee that the application will work or that hardware acceleration is active.
4. Run i3 with hardware acceleration
If you want to apply the environment variables to the entire i3 session, add the following lines to the VNC startup script before exec i3:
export GALLIUM_DRIVER=virpipe
export MESA_GL_VERSION_OVERRIDE=4.0
exec i3
Restart the VNC session after changing the script:
vncserver -kill :1
vncserver :1
Check that VirGL is actually working and test compatibility with your applications. Some applications may render incorrectly or fail to start.
Dealing with the Phantom Process Killer
The Android Phantom Process Killer is a system feature introduced in Android 12 that can automatically terminate background apps and child processes. This can cause crashes and signal 9 errors in heavy background environments like Termux. The exact behaviour and limits can vary across Android versions and manufacturers.
While most websites show you multiple lines of ADB commands to run, there is no need to disable process monitoring just to try increasing the limit. Some workarounds disable monitoring and may affect Android’s ability to track other apps’ usage.
So it’s better to try increasing the limit rather than disabling the feature entirely.
Download the latest Platform Tools on Windows from here and follow the instructions for setting up the tools on Windows.
For Linux, use your distro’s package manager. I’m using Arch, for example:
sudo pacman -S android-tools android-udev
Now enable Developer options by tapping the Build number option under Settings > About phone > Build number. The exact location may vary by manufacturer.
Connect your phone to your PC via USB and run:
adb devices
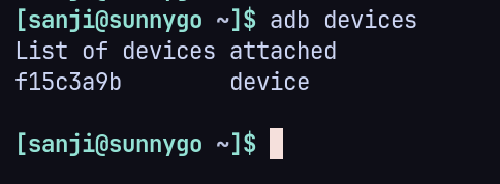
Allow USB debugging by selecting Allow on your phone. You’ll see your phone listed there.
Now run:
adb shell "/system/bin/device_config put activity_manager max_phantom_processes 2147483647"
This sets a very high configured limit, but it isn’t guaranteed to prevent every process termination or persist across reboots on every device. Verify the setting and test whether it helps your particular setup.
Smartphones are modern supercomputers trapped inside restrictive mobile interfaces. With Termux, i3, and TigerVNC, you can unlock a lightweight, fully functional portable GNU/Linux environment that you can stream to any screen.